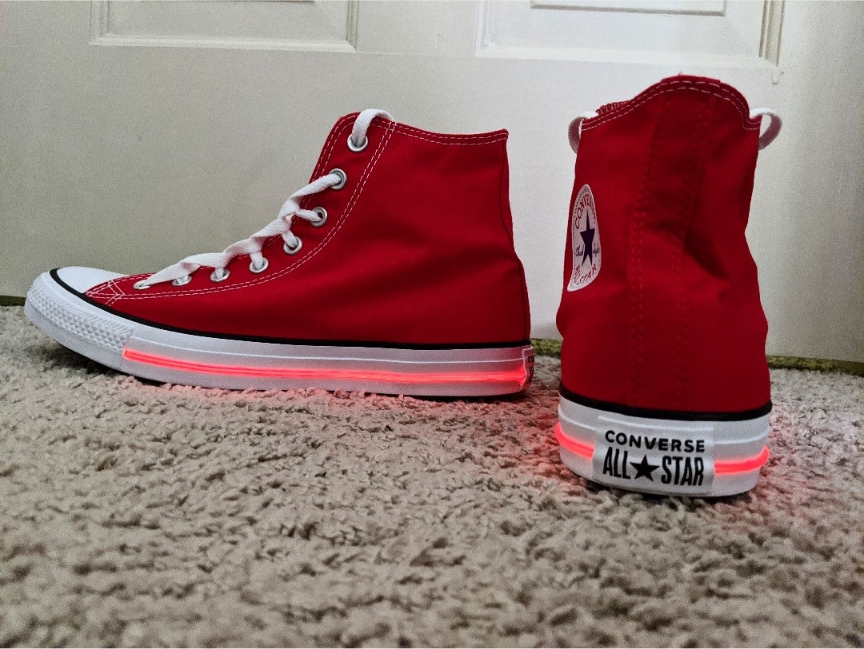
More angles/deets on IG @jilanico
Everything Cyberpunk 2077
Rules
Be cool. No racism, sexism, homophobia, transphobia etc.
Mark spoilers and NSFW
Friends
More angles/deets on IG @jilanico
Ok, here's a quick version of the guide:
Having said all that, I must say the battery doesn't last long. If I were to do this again I'd try to use LED filament.
yo that’s sick
I need a how to pls
I wrote a step-by-step on Reddit but I think that sub went dark 😅 there are some pics on my Instagram showing the wiring tho
Any chance of re-posting or re-creating that guide here?
Just posted a shortened version in this thread
It was long and detailed 😩 this was the URL for it: https://www.reddit.com/r/Converse/comments/qhwm2g/cyberpunk_2077_inspired_chucks/
I agree. Wouldn’t hurt to post a guide here. Would definitely be interested.
Just posted a shortened version in this thread
This was the URL for the guide: https://www.reddit.com/r/Converse/comments/qhwm2g/cyberpunk_2077_inspired_chucks/
Commenting to show interest in the guide since I'm building a V cosplay for this summer... Went to check out the pics on IG but having a step-by-step guide would also be helpful.
Just posted a shortened version in this thread
This was the URL for the guide: https://www.reddit.com/r/Converse/comments/qhwm2g/cyberpunk_2077_inspired_chucks/
Just posted a shortened version in this thread
I know. I checked there too. It was archived before I posted the how-to in the comments. If/when the sub goes public again you'll be able to see the guide. Sorry :(
Just posted a shortened version in this thread
This was the URL for the how-to guide: https://www.reddit.com/r/Converse/comments/qhwm2g/cyberpunk_2077_inspired_chucks/
Good job, looks really cool!